Tools Introduction Class
Tools Feature & Advantage Introduction Class
Tools Operation and Application Class
Tools Maintanence and Repair Class
Tools Quality Checking and Certified Class
Tools Torque Introduction
Marketing Service Area
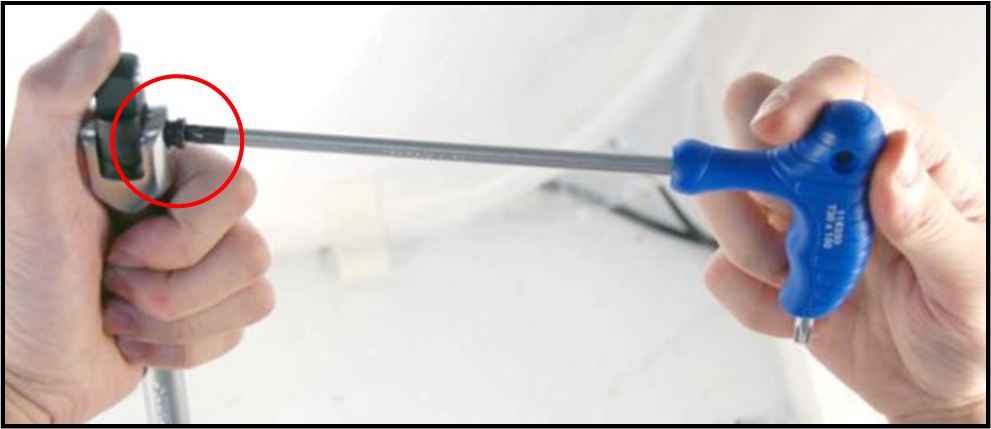
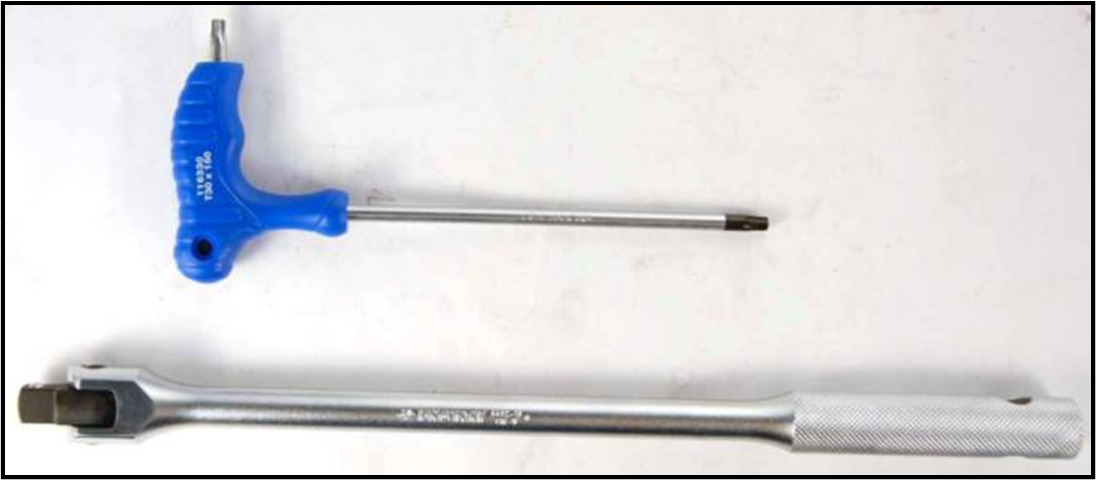
The Maintenance of the Flexible Handle and Ratchet Handle
Popularity : 25352F Handle

F Handle Assembly
| 1 | 2 | 3 |
|---|---|---|
 |
 |
 |
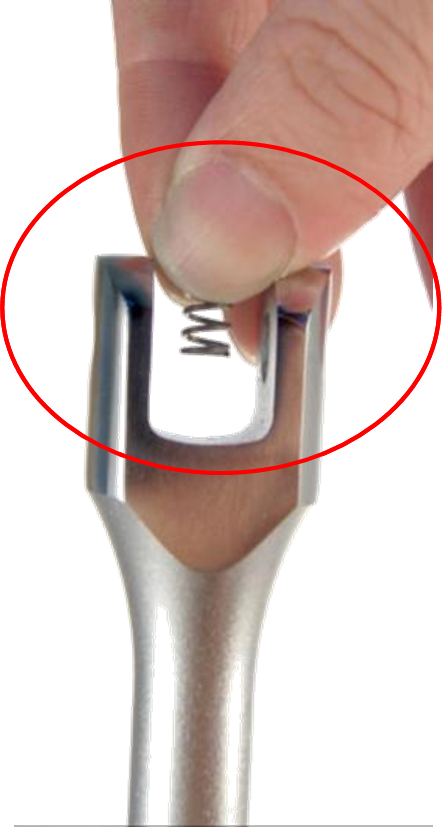
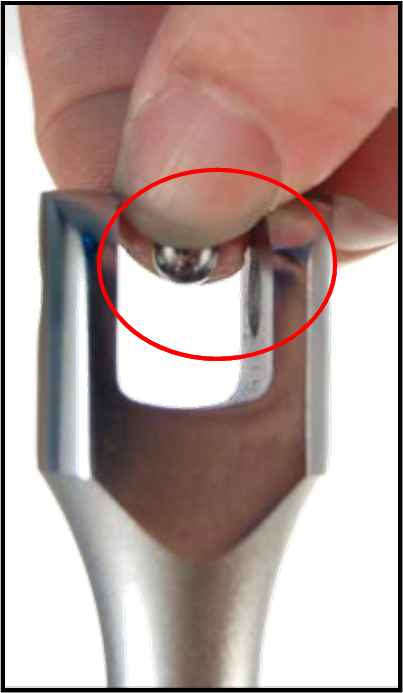
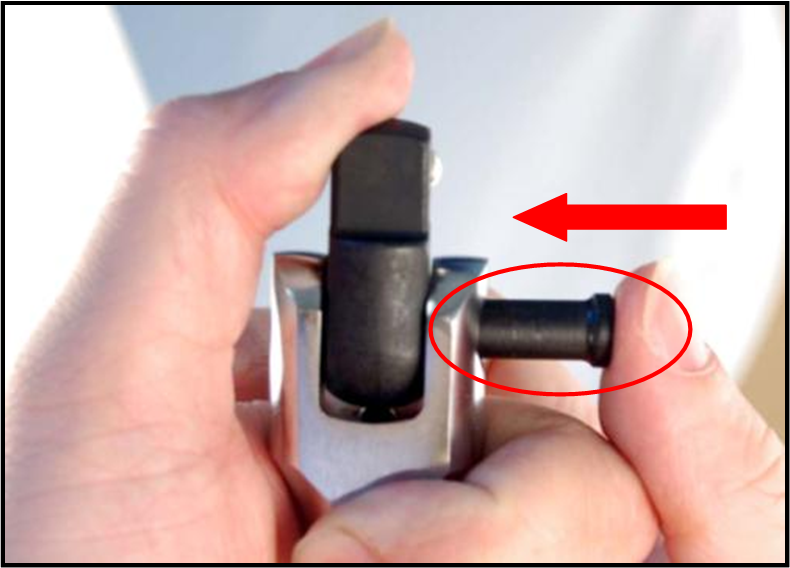
| Initially, insert the spring into the hole that is design inside the U groove of the handle. | Place the steel ball into the hole. | Install the drive into the U groove. Slightly apply force to the drive until the screw hole of the handle and the drive is aligned. |
| 4 | 5 | 6 |
 |
 |
 |
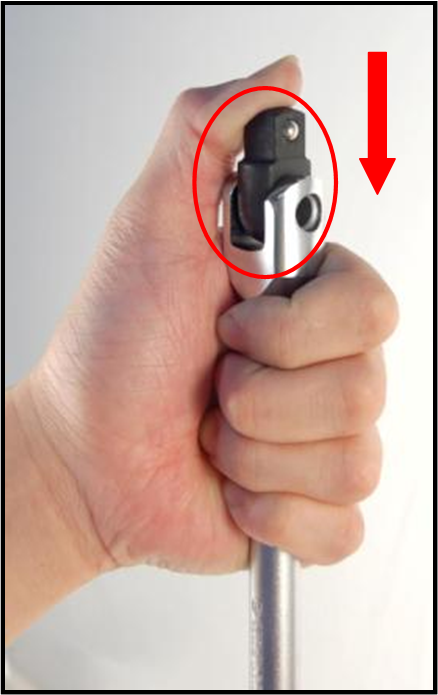
| Tuck the screw into the aligned screw hole and push to the bottom. | Utilize the L wrench to tighten the screw till it is fully screwed on. | Assembly accomplished. |
Ratchet Handle
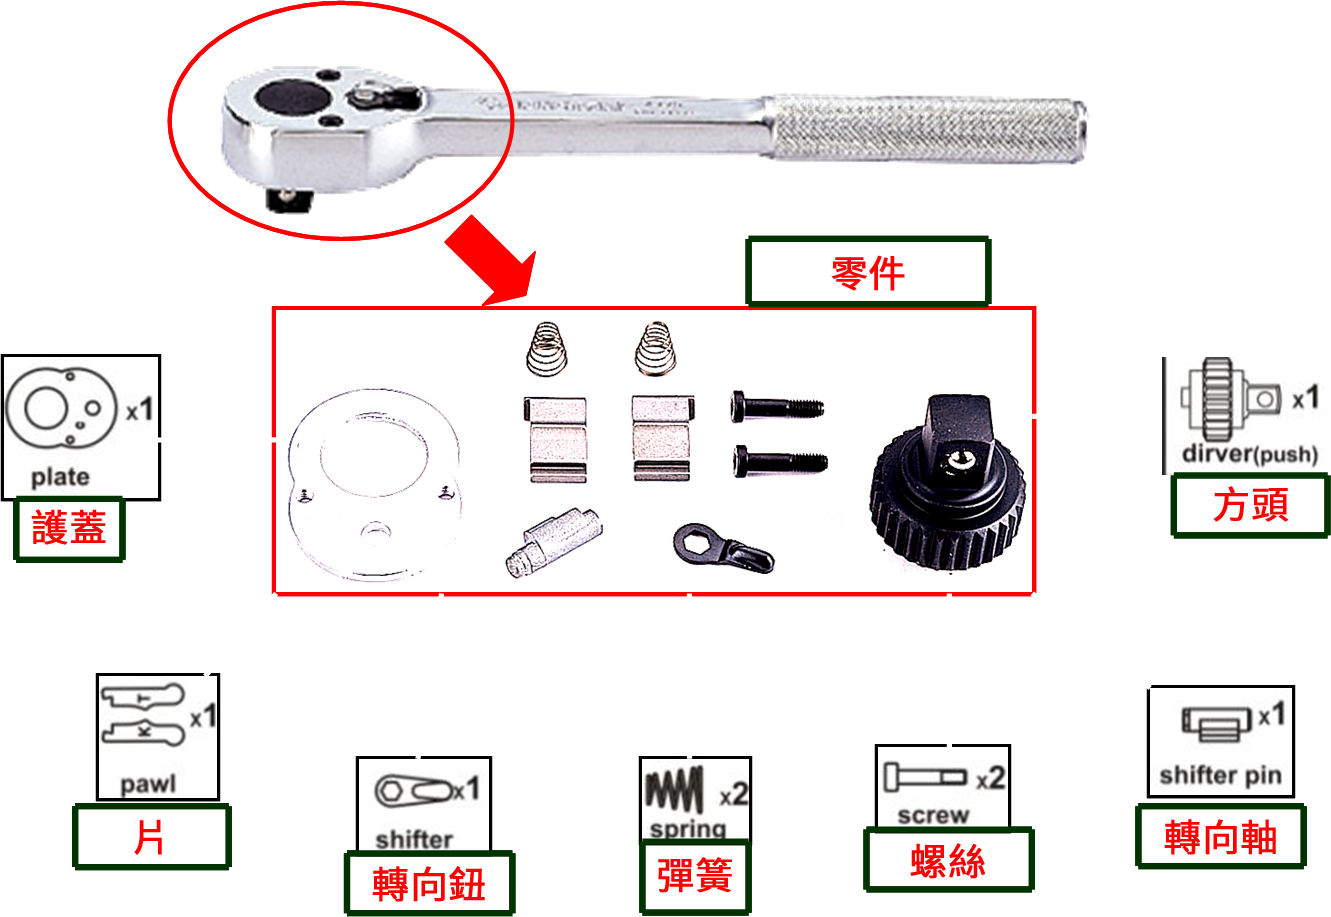
Ratchet Handle Assembly
| 1 | 2 | 3 |
|---|---|---|
 |
 |
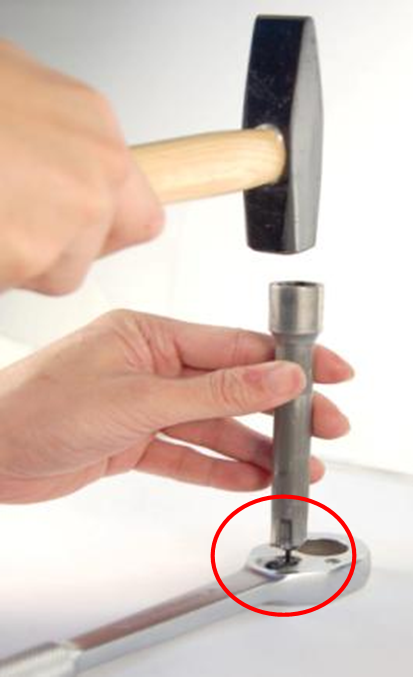 |
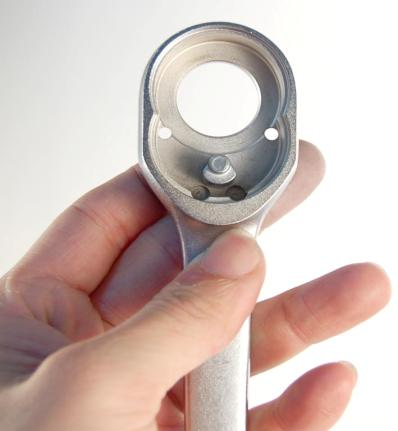
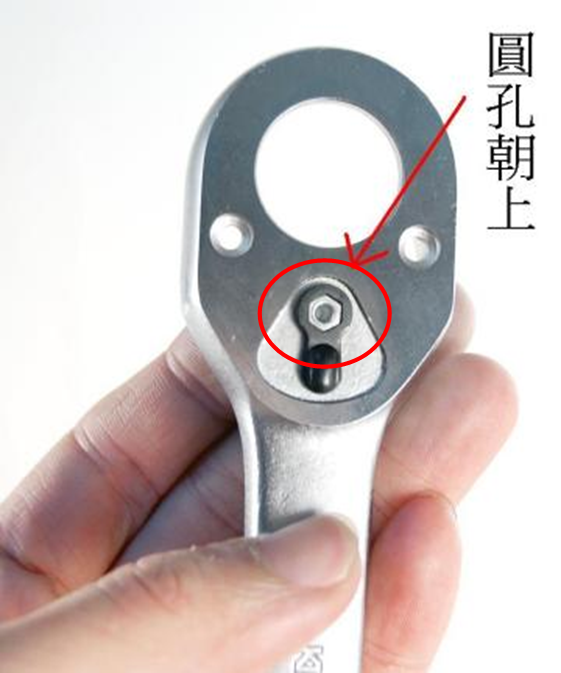
| Place the direction axis into the round hole. Remember to center justify the arc, or one of the direction will be dysfunctional. Meanwhile, the round hole of the axis should face the front of the handle. | Put the direction shiver on the axis. The direction of the shiver should point to six o’clock. | Insert the rivet vertically into the round hole and hammer it fully into to axis. Please note that the rivet should be exactly vertical to the handle. Reinsert the rivet if necessary. |
| 4 | 5 | 6 |
|---|---|---|
 |
 |
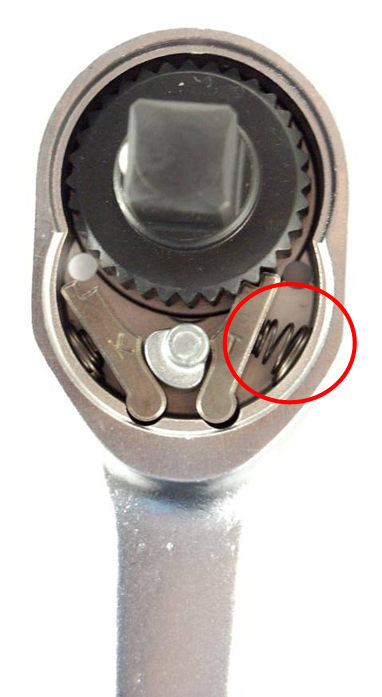 |
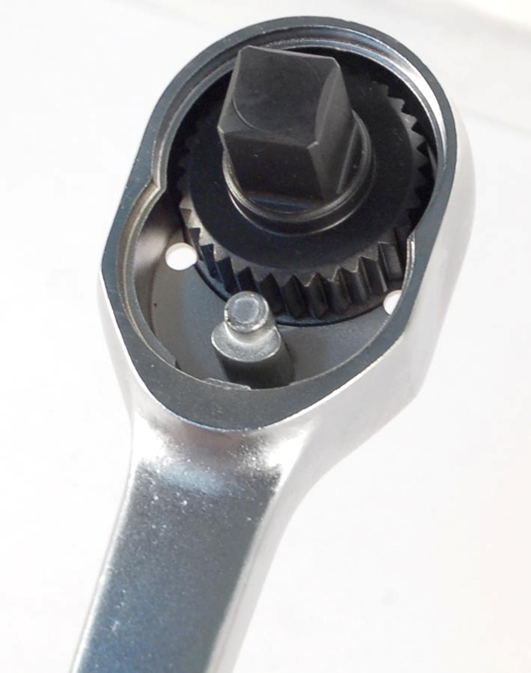
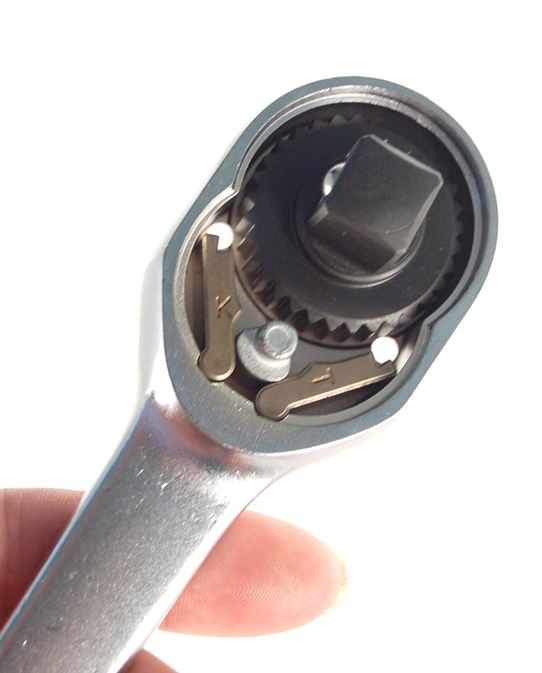
| Put the drive into the handle. The square side should face the reverse side of the handle. | Place the pawls into the groove. The K pawl should be placed on the left and the T pawl should be put on the right. | Insert the springs into the gap between the pawls and the handle. The technique of spring inserting is to squash it into a flat object, then put into the gap. |
| 7 | 8 | 9 |
|---|---|---|
 |
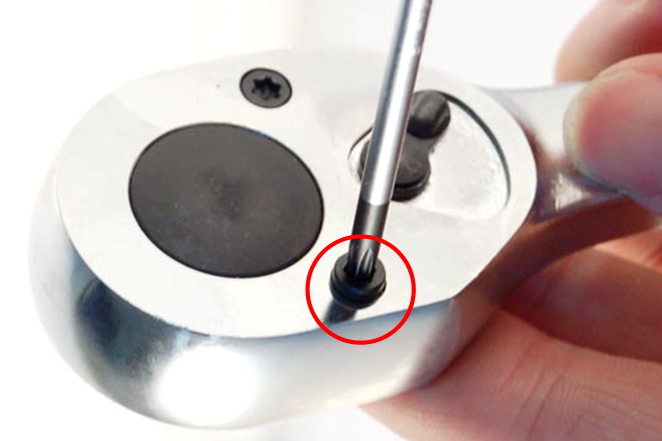 |
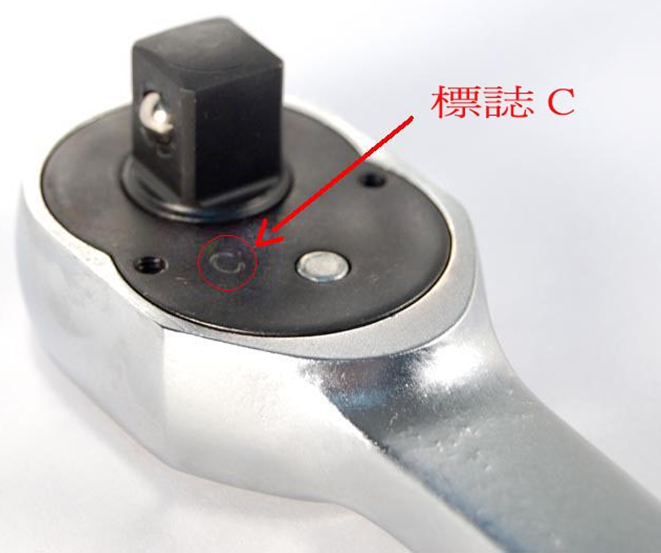
 |
| Cover the back side of the handle with the plate. The side with a letter ‘C’ should face outward. | Screw on the screw into the screw hole. Do not overtighten the screw. | Assembly accomplished. |


