Tools Introduction Class
Tools Feature & Advantage Introduction Class
Tools Operation and Application Class
Tools Maintanence and Repair Class
Tools Quality Checking and Certified Class
Tools Torque Introduction
Marketing Service Area
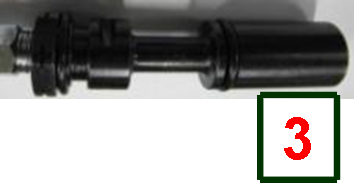
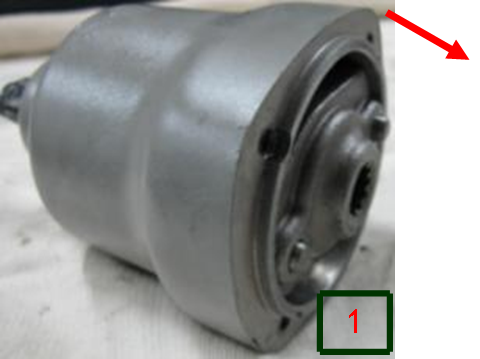
Composite Impact Wrench
Popularity : 27310Pneumatic Wrench Repairing
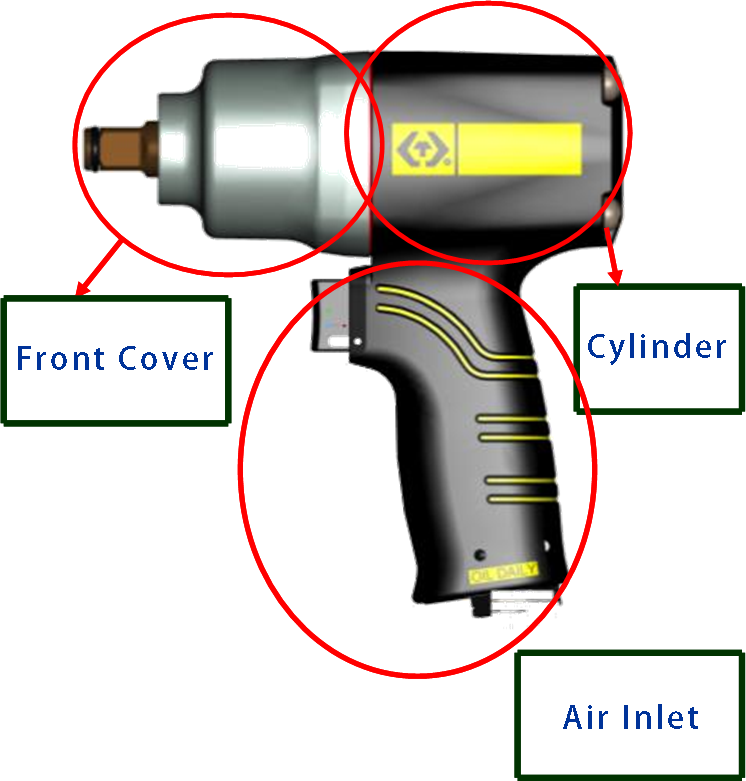
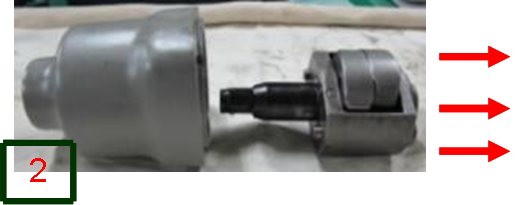
When it comes to repairing, pneumatic wrench is mostly divided into three main parts, which are the front cover, cylinder (the adjusting button) and air inlet.
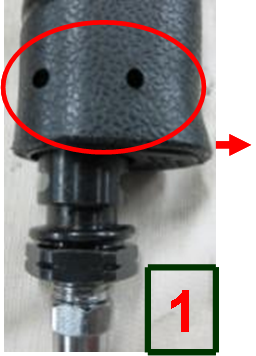
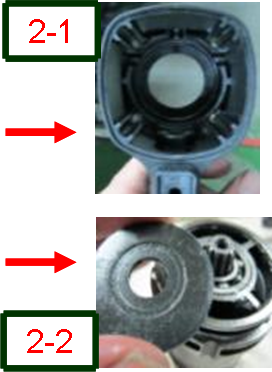
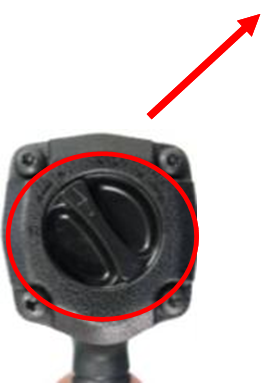
Air Inlet Dismantling
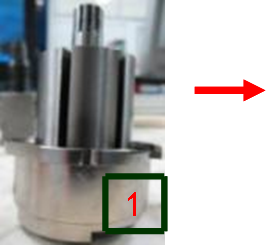
- Utilize a Φ3.2mm - Φ4mm tool to extract 2 pins that illustrated in Pic-1.
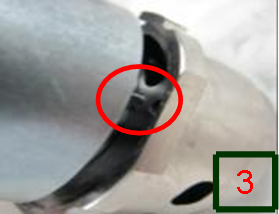
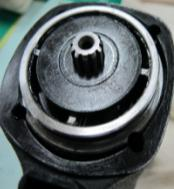
- As Pic-3 demonstrated, take out the whole air inlet set.
- Take out the buckle inside of the air inlet set, then the interior parts will be taken out as well.
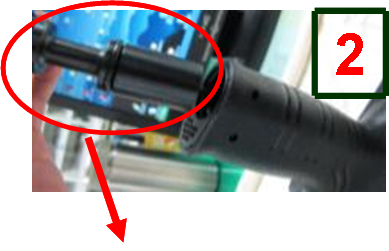

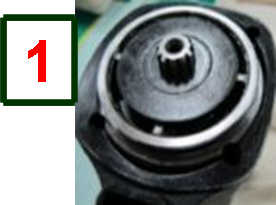
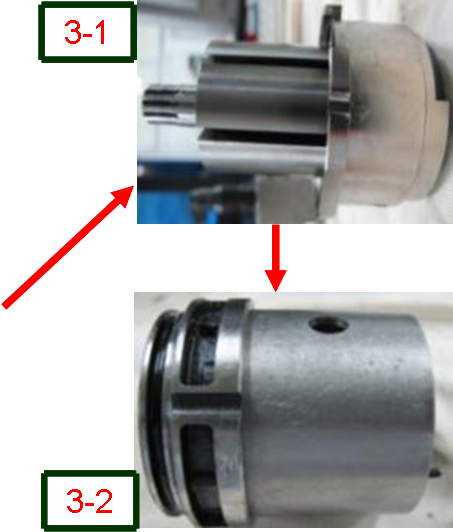
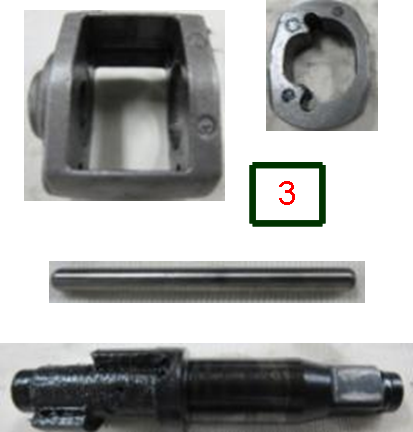
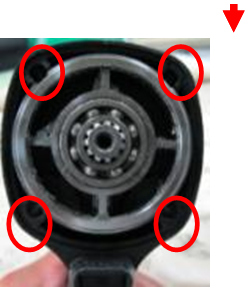
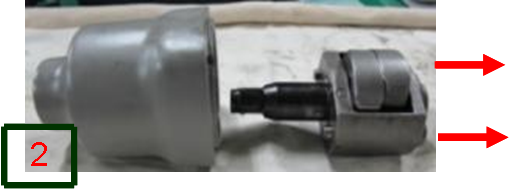
Rotor Cylinder Dismantling
- Seperate the rotor cylinder and the front cover.
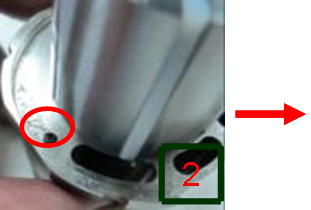
- Loosen the screws and seperate the rotor cylinder with the handle as Pic-2 depicts. Extract the washer from the rotor cylinder, dismantle the rotor and cylinder then take out the rotor blade.
Screw should be loosen locking in corner or synthetically.
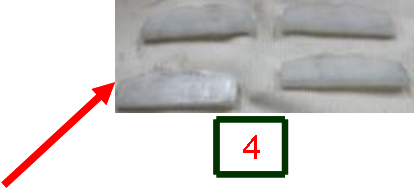
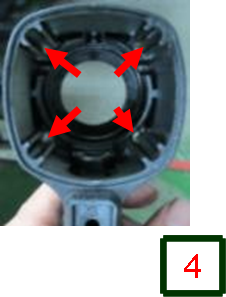
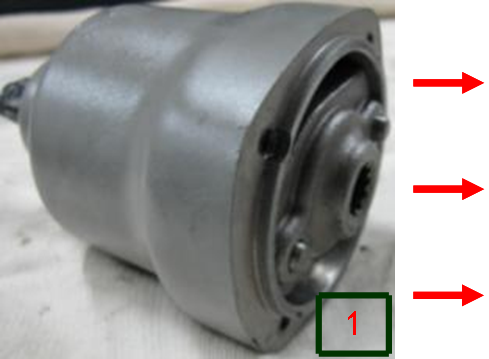
Front Cover Dismantling
- Extract the hammer, then the parts can be taken out.
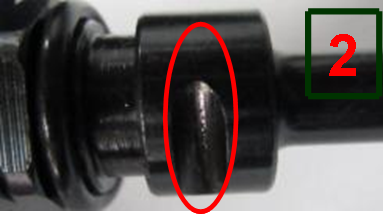
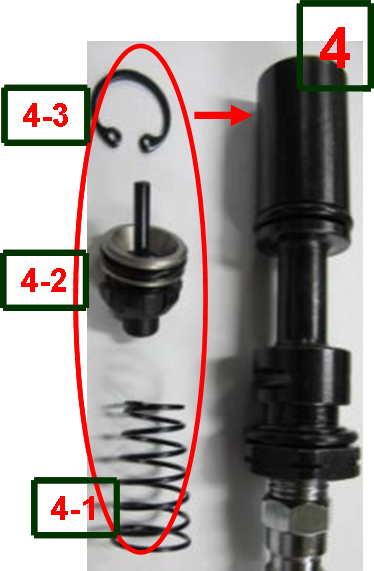
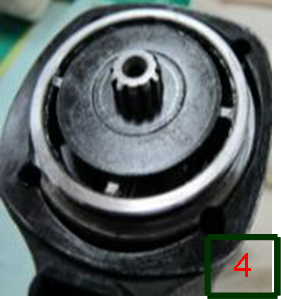
Air Inlet Valve Assembling

- Assemble all parts of the air inlet valve. Put the spring 4-1 into the valve, then insert the buckle 4-3.
- Place the air inlet set into the handle.
Please notice that the trigger should be pulled out before the set is inserted!
The lengths of the grooves that are illustrated in Pic-2 are different from each other. The placement should be remain long to long and short to short. Insert the pins after finishing the installment, then pull the triggerto tetify whether the assembly is completed.
The direction of the trigger and the air inlet set require special attention when assembling.

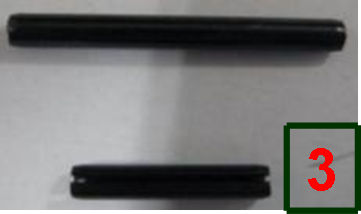
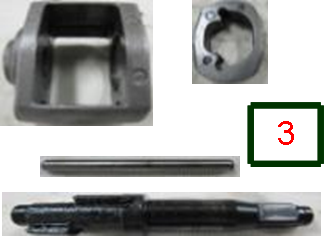
Rotor Cylinder Assembling
- Place the blade onto the rotor initially.
- Put the cylinder in, then insert the pin of the cylinder into the hole that is on the bottom of the rotor.
- Assemble the whole set of rotor cylinder and replace the old lubrication with new. The direction and the position of the hole require special attention when assembling.
- Insert the washer with the direction of protrude side facing the rotor cylinder, then the assembly is completed.
Front Cover Assembling
- Assemble all part with the order that listed below.
Hammer Cage > Hammer > Pin > Front Cover
Pneumatic Wrench -
Repairing Conclusion
Air is being consumed yet the rotation is inconsistent or can`t be started?
-
Assure whether the trigger is functioning.
-
Assure whether the hammer is broken by open the front cover.
-
Assure whether the pressure adjusting button is functioning.
-
Assure whether the direction adjusting button is functioning.
The rotation starts automatically without pulling the trigger or the trigger isn`t rebounding after pulling it?
-
Assure whether the trigger has fallen off.
-
Assure whether the pin has fallen off or the impurities have attatched by unscrewing the screws and take off the lid from the air inlet.
After assuring the issues that mentioned above and the situation of inconsistent rotating and the failure of elevating the torque remains?
-
Inspect whether the gaskets and washers are broken leads to air leaking by opening the front covor.
-
Inspect whether the rotor blade is broken by opening the rotor cylinder.
Basic Maintenance
-
Place the pneumatic wrench down gently, softly and carefully after using.
-
Fill in the spindle oil from the air inlet before and after using the pneumatic wrench in order to avoid rusting and the inconsistent functioning.
-
Do not intend to disassemble objects that cannot be disassembled. Searching for proper method to loosen the screw first should be done initially, besides, the service life of the tool can also be lengthened.
-
Be aware of the screw tightening matters of components when asssembling the pneumatic wrench from disassembly.
* It is noticeably that the matter of lubricating and screw tightening (locking in corner or synthetically can highly narrow the gaps) should be taken into account after the repairment of the pneumatic wrench.
Air Compression System Establishing Advices

-
Air compressor generates compressed air.
-
Process through the composition of 3.
-
Attach with the air hose then connect the pneumatic tool.
-
Compressed air enter the pneumatic tool and can be released by pulling the trigger.
-
Compressed air enter the motor.
-
Motor generates energy and transfer to the transmission.
These are the standard process of setting air compression system that can lengthen the service life of the pnuematic tool by insulating moisture and dust from the machine.
